
Videos are a great tool to introduce your learners to new information, concepts, and skills. In this article, you can find some simple steps to make your videos stand out and be more accessible to your learners.
Start by picking the best name for your videos
Choose a name that accurately reflects the content of the video and the assignment. Create a thumbnail with that name, see below.
Add a Thumbnail for your video
The thumbnail of a video is the still image that appears before your viewers begin watching your video. Most video-sharing sites choose a frame from the video by default, sometimes this could catch a moment in the video that maybe doesn't fit or explain the content very well. Instead, you can create and upload your own thumbnail. You can, for example, create an image with a photograph and with a title that colour-match the branding of your site.
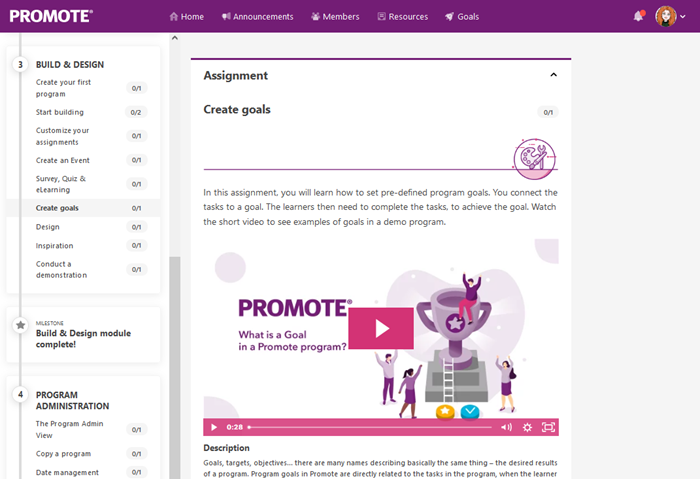 An example of an assignment with a demo video that has a customized thumbnail.
Here are thumbnail guides for a couple of video-sharing platforms:
- Add a thumbnail for videos on Wistia >
- Add a thumbnail for videos on YouTube >
- Add a thumbnail for videos on Vimeo >
Add captions and subtitles
Captions can really improve the viewers' experience of your videos, but it also covers the important question of accessibility - by adding captions to your videos you can ensure that everyone who wants to watch your content can.

Here are guides for captions and subtitles on a couple of video-sharing platforms:
- Add captions for videos on Wistia >
- Add captions for videos on YouTube >
- Add captions for videos on Vimeo >
You can order transcripts from a professional service. If you want to give it a try yourself, there are some free tools out there so you don't have to start from scratch, for example, YouTube has automatic captions for videos uploaded on their platform, learn more > Another transcription service that is really time-saving if you are planning to translate subtitles into several languages is Maestra, learn more >
More guides and tips